LinuxでZabbix 6.4をソースからインストールして環境構築する方法
目標
- LinuxにZabbix(Zabbix サーバーとエージェント)をソースからインストールする。
※2023年4月17日時点の最新バージョン(Zabbix 6.4.1)をインストールします。
- Zabbix 6.4.1の以下のインストール要件を満たすMySQL・PHP・Apacheもインストールします。
・MySQL 8.0.30以降
・PHP 8.0以降
・Apache 1.3.12以降
目次
- Apacheインストール
- PHPインストール
- PHP設定ファイルの編集
- MySQLインストール
- MySQLの初期設定
- Zabbixのソースダウロード
- Zabbixユーザーとグループの作成
- Zabbixデータベースの作成
- Zabbixインストール
- Zabbix設定ファイルの編集
- Zabbix自動起動の設定
- Zabbixの起動
- Zabbixフロントエンドのインストール
Apacheインストール
1. 以下のコマンドを入力し、apacheをインストールします。
Debian系 $ sudo apt install apache2
RedHat系 $ sudo yum install httpd
RedHat系 $ sudo systemctl start httpd
※インストールしたApacheの各種フォルダとファイルのパスは以下の通りです。環境により異なる場合があります。
/var/www/html/ → Apacheの公開ディレクトリ(ドキュメントルート)
/etc/apache2/apache2.conf → Apache設定ファイル(Debian系)
/etc/httpd/conf/httpd.conf → Apache設定ファイル(RedHat系)
/var/log/apache2/access.log → アクセスログ(Debian系)
/var/log/httpd/access.log → アクセスログ(RedHat系)
/var/log/apache2/error.log → エラーログ(Debian系)
/var/log/httpd/error.log → エラーログ(RedHat系)
2. Apacheのバージョン情報が表示されることを確認します。
Debian系 $ apache2 -v
RedHat系 $ httpd -v
Server version: Apache/2.4.52
Server built:   2023-03-08T17:32:01
3. 設定ファイルにエラーがないかチェックします。
Debian系 $ apache2 -t
RedHat系 $ httpd -t
Syntax OK
※エラーが発生した場合は個別に対応します。よく見かけるエラーとしては以下があります。
・エラー内容
Debian系 $ apache2 -t
RedHat系 $ httpd -t
[Thu Apr 20 15:40:02.258021 2023] [core:warn] [pid 5285] AH00111: Config variable ${APACHE_RUN_DIR} is not defined
apache2/httpd: Syntax error on line 80 of /etc/apache2/apache2.conf: DefaultRuntimeDir must be a valid directory, absolute or relative to ServerRoot
・解決方法として以下のコマンドを入力します。
$ source /etc/apache2/envvars
・エラー内容
Debian系 $ apache2 -t
RedHat系 $ httpd -t
AH00558: apache2/httpd: Could not reliably determine the server's fully qualified domain name, using 127.0.1.1. Set the 'ServerName' directive globally to suppress this message
・解決方法として設定ファイルを編集し、以下の内容を追記して保存します。
Debian系 $ sudo vi /etc/apache2/apache2.conf
RedHat系 $ sudo vi /etc/httpd/conf/httpd.conf
ServerName localhost:80
4. 以下のURLにアクセスし、デフォルトページが表示されることを確認します。
http://localhost/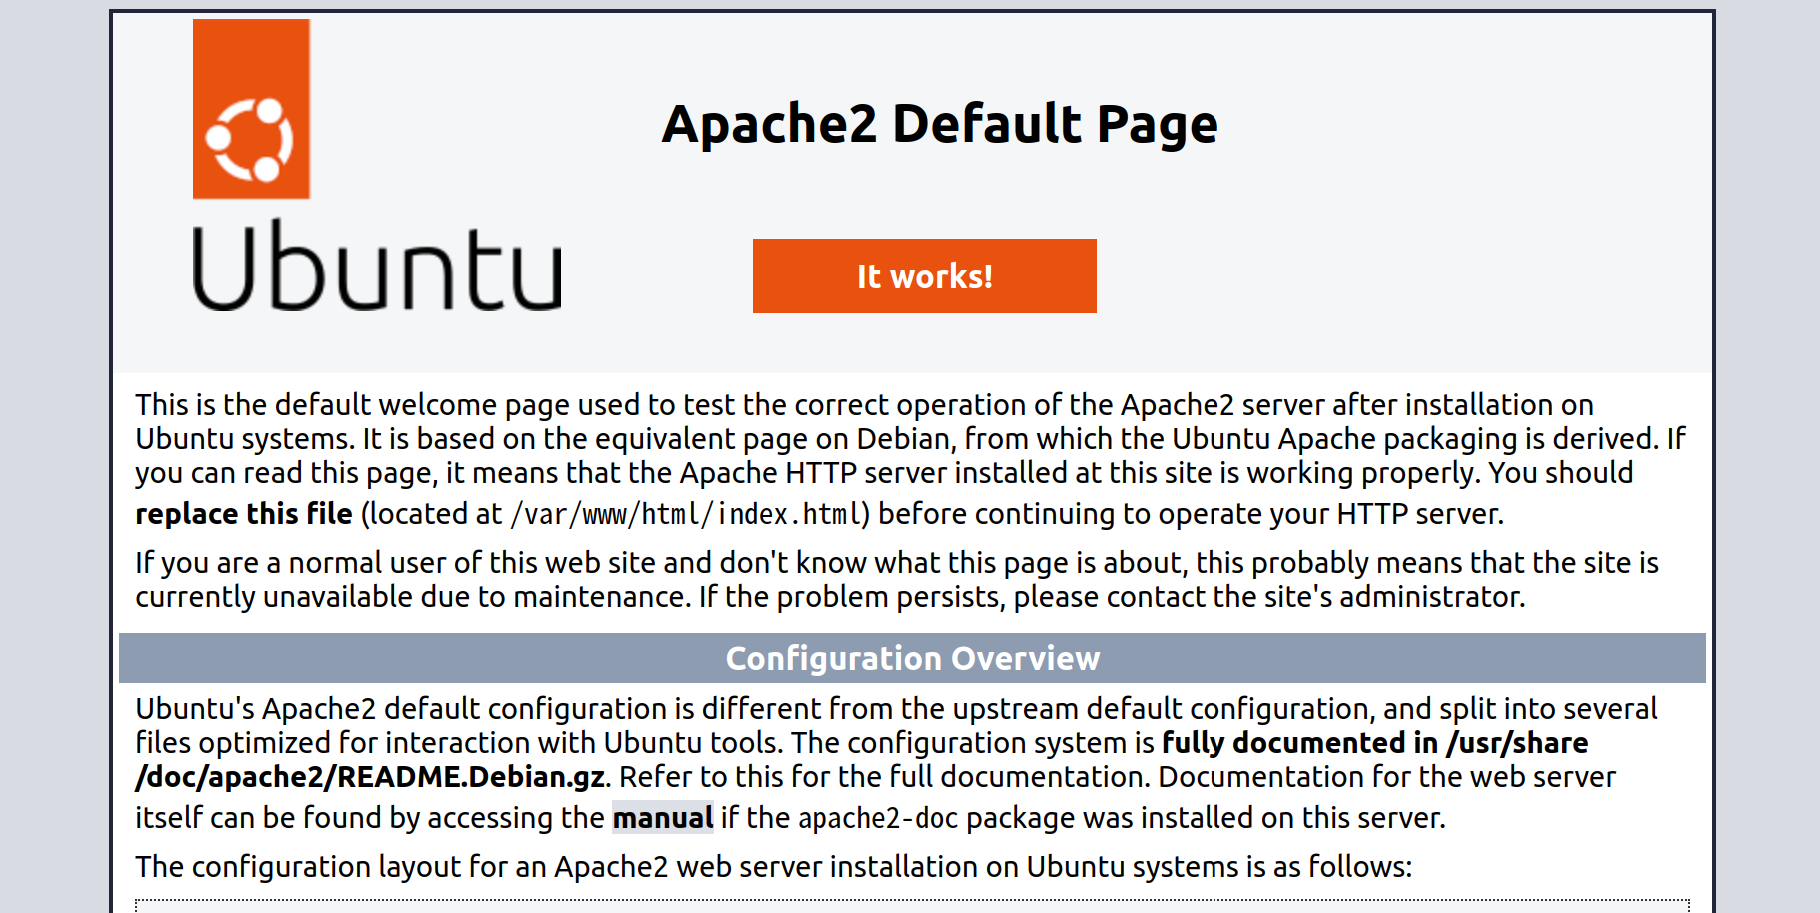
※画像はUbuntuの場合
PHPインストール
1. 以下のコマンドを入力し、PHPをインストールします。
Debian系 $ sudo apt install php libapache2-mod-php
RedHat系 $ sudo yum install php
2. 関連のモジュールも併せてインストールします。
Debian系 $ sudo apt install php-mbstring php-gd php-mysql php-curl php-bcmath php-xml php-common php-ldap
RedHat系 $ sudo yum install php-mbstring php-gd php-mysqlnd php-curl php-bcmath php-xml php-common php-ldap
3. PHPのバージョン情報が表示されることを確認します。
$ php -v
PHP 8.1.2 (cli) (built: Feb 22 2023 22:56:18) (NTS)
Copyright (c) The PHP Group
Zend Engine v4.1.2, Copyright (c) Zend Technologies
    with Zend OPcache v8.1.2 Copyright (c), by Zend Technologies
PHP設定ファイルの編集
1. PHPの設定ファイルを編集し、修正後の内容で保存します。
Debian系 $ sudo vi /etc/php/8.1/apache2/php.ini
RedHat系 $ sudo vi /etc/php.ini
修正前
;date.timezone =
post_max_size = 8M
max_execution_time = 30
max_input_time = 60
修正後
date.timezone = Asia/Tokyo
post_max_size = 16M
max_execution_time = 300
max_input_time = 300
2. Apacheを再起動します。
Debian系 $ sudo service apache2 restart
RedHat系 $ sudo systemctl restart httpd
※php-fpmもインストールしている場合はphp-fpmの再起動もしてください。
$ sudo systemctl restart php-fpm
3. ドキュメントルートへ移動します。
$ cd /var/www/html/
4. 「info.php」ファイルを新規作成し、下記の内容で保存します。
$ sudo vi info.php
<?php
  phpinfo();
?>
5. 以下のURLにアクセスし、PHPのバージョン情報が表示されることを確認します。
http://localhost/info.php
MySQLインストール
1. 以下のコマンドを入力し、MySQLをインストールします。
Debian系 $ sudo apt install mysql-server
RedHat系 $ sudo yum install mysql-server
RedHat系 $ sudo systemctl start mysqld
2. MySQLのステータス情報が表示されることを確認します。
Debian系 $ sudo service mysql status
RedHat系 $ sudo systemctl status mysqld
* mysql.service - MySQL 8.0 database server
     Loaded: loaded (/lib/systemd/system/mysql.service; enabled; vendor preset: enabled)
     Active: active (running) since Thu 2023-04-20 16:36:32 JST; 36s ago
    Process: 18365 ExecStartPre=/usr/share/mysql/mysql-systemd-start pre (code=exited, status=0/SUCCESS)
   Main PID: 18374 (mysqld)
     Status: "Server is operational"
3. rootユーザーでMySQLログインします。
$ sudo mysql -u root -p
4. 何も入力しないでEnterキーを押します。
Enter password:
5. 任意のパスワードを設定します。
mysql> ALTER USER 'root'@'localhost' IDENTIFIED WITH mysql_native_password BY 'rootpass';
mysql> quit;
※ここではパスワードとして「rootpass」を設定しています。
※rootユーザーのパスワードを設定していないと後述のmysql_secure_installation実行時に必ずエラーになるため注意。
MySQLの初期設定
1. 以下のコマンドを入力します。
$ sudo mysql_secure_installation
2. 先ほど設定したパスワードを入力し、Enterキーを押します。
Securing the MySQL server deployment.
Enter password for user root:
※ここでは「rootpass」を入力しています。
3. パスワードを変更するか尋ねられますがここでは変更しないため、「n」を入力し、Enterキーを押します。
The 'validate_password' component is installed on the server.
The subsequent steps will run with the existing configuration
of the component.
Using existing password for root.
Estimated strength of the password: 50
Change the password for root ? ((Press y|Y for Yes, any other key for No) : n
4. 匿名ユーザーを削除するかどうか尋ねられます。任意の値(y または n)を入力し、Enterキーを押します。
Remove anonymous users? (Press y|Y for Yes, any other key for No) : y※ここでは「y」を入力しています。
5. rootユーザによるリモートログインを禁止するかどうか尋ねられます。任意の値(y または n)を入力し、Enterキーを押します。
Disallow root login remotely? (Press y|Y for Yes, any other key for No) : y※ここでは「y」を入力しています。
6. デフォルトで作成される「test」データベースを削除するかどうか尋ねられます。任意の値(y または n)を入力し、Enterキーを押します。
Remove test database and access to it? (Press y|Y for Yes, any other key for No) : y※ここでは「y」を入力しています。
7. 特権テーブルを今すぐリロードするかどうか尋ねられます。任意の値(y または n)を入力し、Enterキーを押します。
Reload privilege tables now? (Press y|Y for Yes, any other key for No) : y※ここでは「y」を入力しています。
8. 初期設定が完了していることを確認します。
Success.
All done!
Zabbixのソースダウロード
1. Zabbixのソースをダウンロードして展開します。
$ cd /tmp
$ curl https://cdn.zabbix.com/zabbix/sources/stable/6.4/zabbix-6.4.1.tar.gz | tar xvzf -
※コマンド実行後は「/tmp」ディレクトリ内に「zabbix-6.4.1」ディレクトリが作成されます。
Zabbixユーザーとグループの作成
1. 以下のコマンドを実行します。
RedHat系
$ sudo groupadd --system zabbix
$ sudo useradd --system -g zabbix -d /usr/lib/zabbix -s /sbin/nologin -c "Zabbix Monitoring System" zabbix
Debian系
$ sudo addgroup --system --quiet zabbix
$ sudo adduser --quiet --system --disabled-login --ingroup zabbix --home /var/lib/zabbix --no-create-home zabbix
2. ログファイルの保存場所を作成します。
$ sudo mkdir /var/log/zabbix
$ sudo chown -R zabbix:zabbix /var/log/zabbix
※zabbixのログの保存場所として、「/var/log/zabbix」を作成しています。
Zabbixデータベースの作成
1. MySQLログインします。
$ mysql -uroot -p<password>※passwordは自環境のrootユーザーのパスワードを入力してください。
2. データベースを作成します。
> create database zabbix character set utf8mb4 collate utf8mb4_bin;
3. ユーザーを作成します。
> create user 'zabbix'@'localhost' identified by 'Zabbix123@';
> grant all privileges on zabbix.* to 'zabbix'@'localhost';
> SET GLOBAL log_bin_trust_function_creators = 1;
> quit;
※ここで作成したユーザー情報は以下になります。
ユーザー名:zabbix
パスワード:Zabbix123@
4. 「Zabbixのソースのダウロード」で展開したディレクトリへ移動します。
$ cd /tmp/zabbix-6.4.1/database/mysql/
5. SQLスクリプトを実行します。
$ mysql -uzabbix -pZabbix123@ zabbix < schema.sql
$ mysql -uzabbix -pZabbix123@ zabbix < images.sql
$ mysql -uzabbix -pZabbix123@ --default-character-set=utf8mb4 zabbix < data.sql
6. MySQLログインし、以下のコマンドを実行します。
$ mysql -uroot -p<password>
> SET GLOBAL log_bin_trust_function_creators = 0;
> quit;
※passwordは自環境のrootユーザーのパスワードを入力してください。
Zabbixインストール
1. 「Zabbixのソースのダウロード」で展開したディレクトリへ移動します。
$ cd /tmp/zabbix-6.4.1
2. Zabbixの環境構築にはGNU拡張機能付きC99が必要なため明示的に指定します。
$ export CFLAGS="-std=gnu99"
3-1. 以下のコマンドを実行します。エラーが発生した場合は後述の解決方法を実施し、再度以下のコマンドを実行します。
$ ./configure --enable-server --enable-agent --with-mysql --enable-ipv6 --with-net-snmp --with-libcurl --with-libxml2 --with-openipmi
3-2. 上記コマンド実行時に発生するエラーと解決方法を以下にまとめて記載します。
※インストール対象のパッケージが存在しない場合は、パッケージの配布元のリポジトリが無効化されていないか確認してください。
・エラー内容
configure: error: no acceptable C compiler found in $PATH・解決方法
Debian系 $ sudo apt install gcc build-essential
RedHat系 $ sudo yum install gcc
・エラー内容
configure: error: MySQL library not found・解決方法
Debian系 $ sudo apt install libmysqlclient-dev
RedHat系 $ sudo yum install mysql-devel
・エラー内容
configure: error: LIBXML2 library not found・解決方法
Debian系 $ sudo apt install pkg-config libxml2 libxml2-dev
RedHat系 $ sudo yum install libxml2 libxml2-devel
・エラー内容
configure: error: Invalid Net-SNMP directory - unable to find net-snmp-config・解決方法
Debian系 $ sudo apt install libsnmp-dev
RedHat系 $ sudo yum install net-snmp-devel
・エラー内容
configure: error: Invalid OPENIPMI directory - unable to find ipmiif.h・解決方法
Debian系 $ sudo apt install libopenipmi-dev
RedHat系 $ sudo yum install OpenIPMI-devel
・エラー内容
configure: error: Unable to use libevent (libevent check failed)・解決方法
Debian系 $ sudo apt install libevent-dev
RedHat系 $ sudo yum install libevent-devel
・エラー内容
configure: error: Curl library not found・解決方法
Debian系 $ sudo apt install libcurl4-openssl-dev
RedHat系 $ sudo yum install libcurl-devel
・エラー内容
configure: error: cannot find pkg-config package for libpcre・解決方法
Debian系 $ sudo apt install libpcre3-dev
RedHat系 $ sudo yum install pcre-devel
4. 3-1のコマンド実行後に以下が表示されていることを確認します。
***********************************************************
*            Now run 'make install'                       *
*                                                         *
*            Thank you for using Zabbix!                  *
*              <http://www.zabbix.com>                    *
***********************************************************
5. 以下のコマンドを実行し、Zabbixをインストールします。
$ sudo make installZabbix設定ファイルの編集
1. Zabbixサーバーの設定ファイルを編集し、修正後の内容で保存します。
$ sudo vi /usr/local/etc/zabbix_server.conf修正前
LogFile=/tmp/zabbix_server.log
# DBHost=localhost
# DBPassword=
修正後
LogFile=/var/log/zabbix/zabbix_server.log
DBHost=localhost
DBPassword=Zabbix123@
※ログファイルの出力先を「Zabbixユーザーとグループの作成」で作成したディレクトリに変更しています。
2. Zabbixエージェントの設定ファイルを編集し、修正後の内容で保存します。
$ sudo vi /usr/local/etc/zabbix_agentd.conf修正前
LogFile=/tmp/zabbix_agentd.log修正後
LogFile=/var/log/zabbix/zabbix_agentd.log※ログファイルの出力先を「Zabbixユーザーとグループの作成」で作成したディレクトリに変更しています。
Zabbix自動起動の設定
1. Zabbixサーバーの起動スクリプトをコピーします。
$ sudo cp /tmp/zabbix-6.4.1/misc/init.d/fedora/core5/zabbix_server /etc/init.d/zabbix_server
$ sudo chmod 755 /etc/init.d/zabbix_server
2. Zabbixサーバーが自動で起動するように設定します。
$ sudo chkconfig --add zabbix_server
$ sudo chkconfig zabbix_server on
$ chkconfig --list zabbix_server
zabbix_server    0:off   1:off   2:on    3:on    4:on    5:on    6:off
3. Zabbixエージェントの起動スクリプトをコピーします。
$ sudo cp /tmp/zabbix-6.4.1/misc/init.d/fedora/core5/zabbix_agentd /etc/init.d/zabbix_agentd
$ sudo chmod 755 /etc/init.d/zabbix_agentd
4. Zabbixエージェントが自動で起動するように設定します。
$ sudo chkconfig --add zabbix_agentd
$ sudo chkconfig zabbix_agentd on
$ chkconfig --list zabbix_agentd
zabbix_agentd    0:off   1:off   2:on    3:on    4:on    5:on    6:off
Zabbixの起動
1. Zabbixサーバーを起動します。
$ zabbix_server
2. Zabbixサーバーのプロセスが起動していることを確認します。
$ ps aux | grep zabbix_server
zabbix     48671  0.0  0.0 141864 13344 ?        S    16:42   0:00 zabbix_server
zabbix     48672  0.0  0.0  96632  7244 ?        S    16:42   0:00 zabbix_server: ha manager
zabbix     48673  0.0  0.0 141868  7176 ?        S    16:42   0:00 zabbix_server: service manager #1 [processed 0 events, updated 0 event tags, deleted 0 problems, synced 0 service updates, idle 5.019332 sec during 5.019403 sec]
zabbix     48674  0.0  0.0 145576 18112 ?        S    16:42   0:00 zabbix_server: configuration syncer [synced configuration in 0.027854 sec, idle 10 sec]
zabbix     48675  0.0  0.0 141868  7048 ?        S    16:42   0:00 zabbix_server: alert manager #1 [sent 0, failed 0 alerts, idle 5.003676 sec during 5.003739 sec]
zabbix     48676  0.0  0.0 141732  4748 ?        S    16:42   0:00 zabbix_server: alerter #1 started
zabbix     48677  0.0  0.0 141732  4748 ?        S    16:42   0:00 zabbix_server: alerter #2 started
zabbix     48678  0.0  0.0 141732  4748 ?        S    16:42   0:00 zabbix_server: alerter #3 started
zabbix     48679  0.0  0.0 363468 17796 ?        Sl   16:42   0:00 zabbix_server: preprocessing manager #1 [queued 8, processed 7 values, idle 5.019562 sec during 5.020401 sec]
zabbix     48680  0.0  0.0 141868  4892 ?        S    16:42   0:00 zabbix_server: lld manager #1 [processed 0 LLD rules, idle 5.019717sec during 5.019786 sec]
※プロセスが存在しない場合は以下のログファイルにエラー等が出力されていないかを確認してください。
/var/log/zabbix/zabbix_server.log
3. Zabbixエージェントを起動します。
$ zabbix_agentd
4. Zabbixエージェントのプロセスが起動していることを確認します。
$ ps aux | grep zabbix_agentd
zabbix     48116  0.0  0.0  22160  2796 ?        S    16:20   0:00 zabbix_agentd
zabbix     48117  0.0  0.0  22160  3436 ?        S    16:20   0:00 zabbix_agentd: collector [idle 1 sec]
zabbix     48118  0.0  0.0  22196  3592 ?        S    16:20   0:00 zabbix_agentd: listener #1 [waiting for connection]
zabbix     48119  0.0  0.0  22160  3508 ?        S    16:20   0:00 zabbix_agentd: listener #2 [waiting for connection]
zabbix     48120  0.0  0.0  22160  3508 ?        S    16:20   0:00 zabbix_agentd: listener #3 [waiting for connection]
zabbix     48121  0.0  0.0  22160  2912 ?        S    16:20   0:00 zabbix_agentd: active checks #1 [idle 1 sec]
※プロセスが存在しない場合は以下のログファイルにエラー等が出力されていないかを確認してください。
/var/log/zabbix/zabbix_agentd.log
Zabbixフロントエンドのインストール
1. ドキュメントルートへ移動します。
$ cd /var/www/html※本手順書ではドキュメントルートは「/var/www/html」になります。
2. Zabbixフロントエンドのファイルを配置するサブディレクトリを作成します。
$ sudo mkdir zabbix
3. Zabbixフロントエンドのファイルを配置します。
$ sudo cp -a /tmp/zabbix-6.4.1/ui/* zabbix
4. 以下のURLにアクセスします。インストールウィザードが表示されていることを確認します。
http://localhost/zabbix/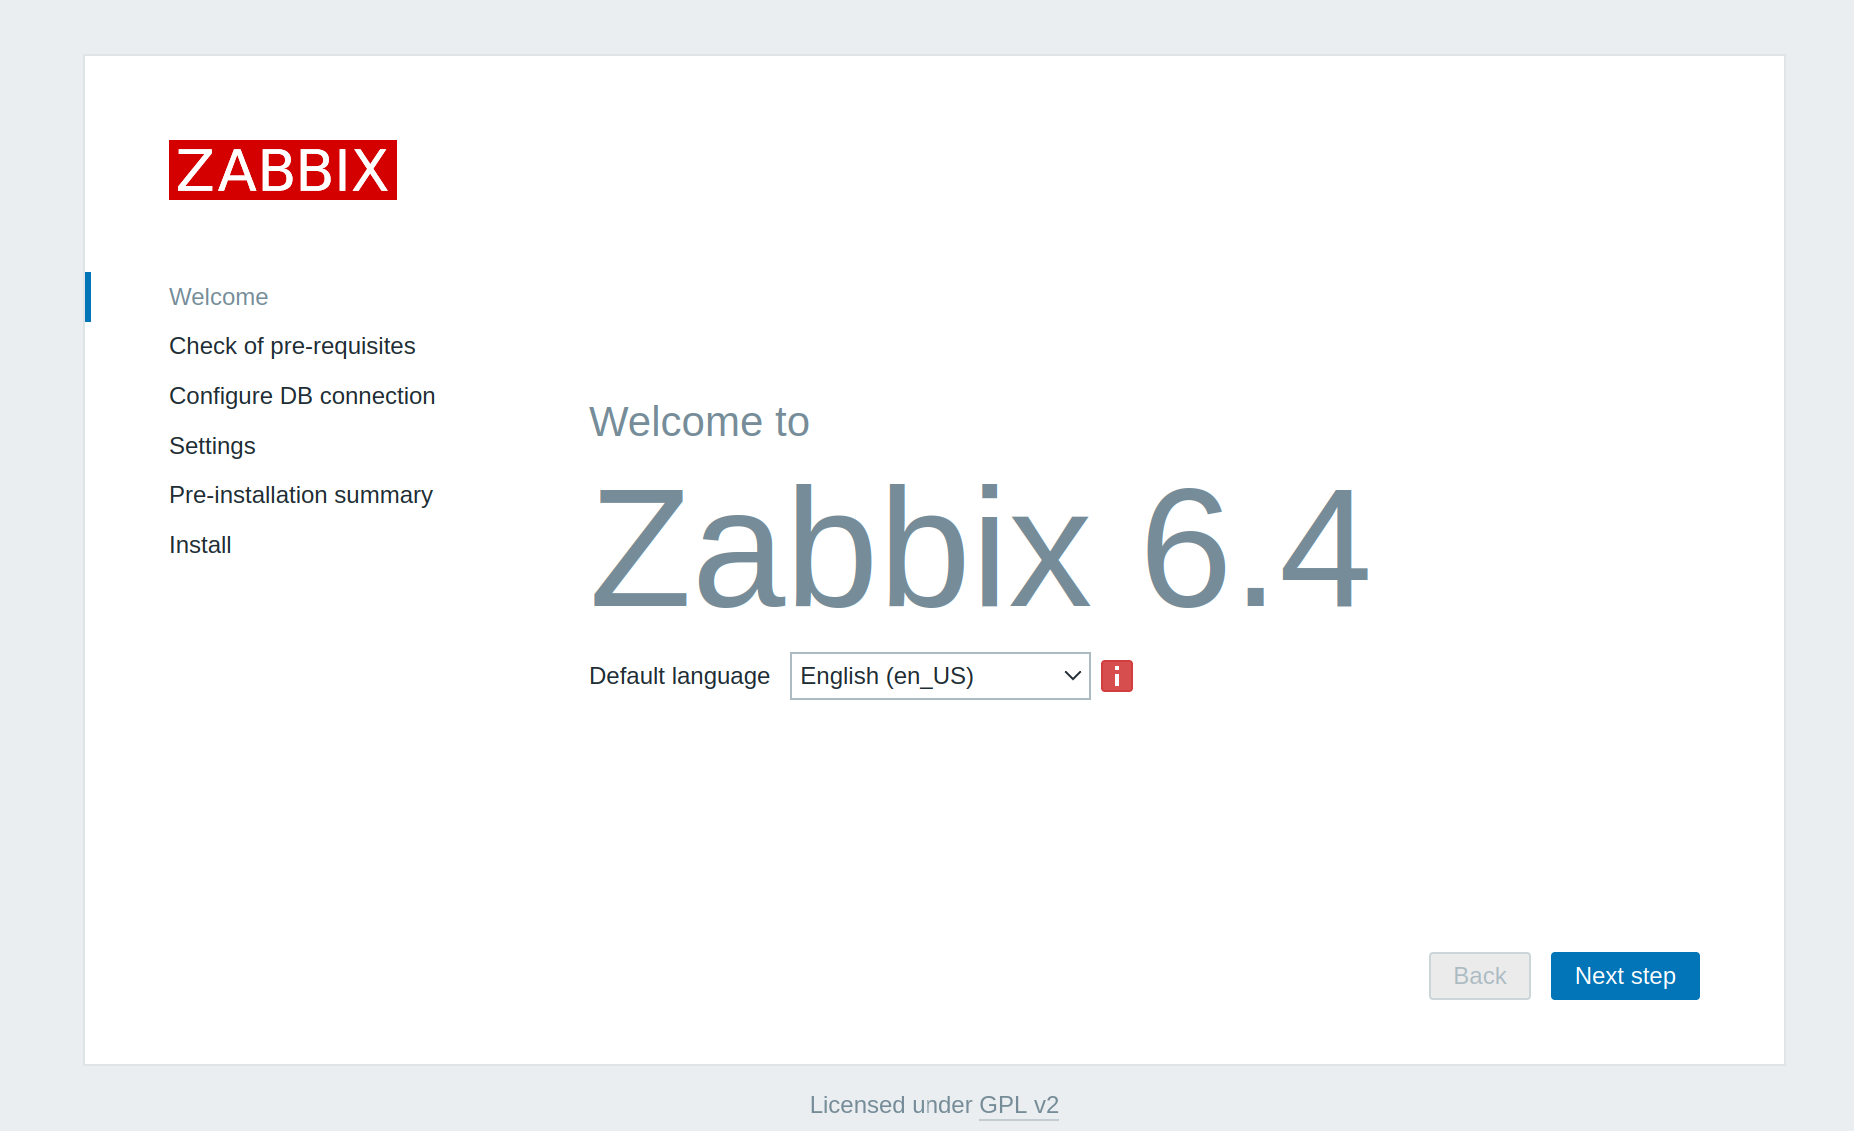
※SELinuxが有効化されている場合は、403エラーページが表示される場合があります。その場合は適切なSELinuxポリシーを設定してください。SELinuxを一時的に無効化するには以下を実行してください。
$ sudo setenforce 0
5. Default languageのJapanese (ja_JP)を選択します。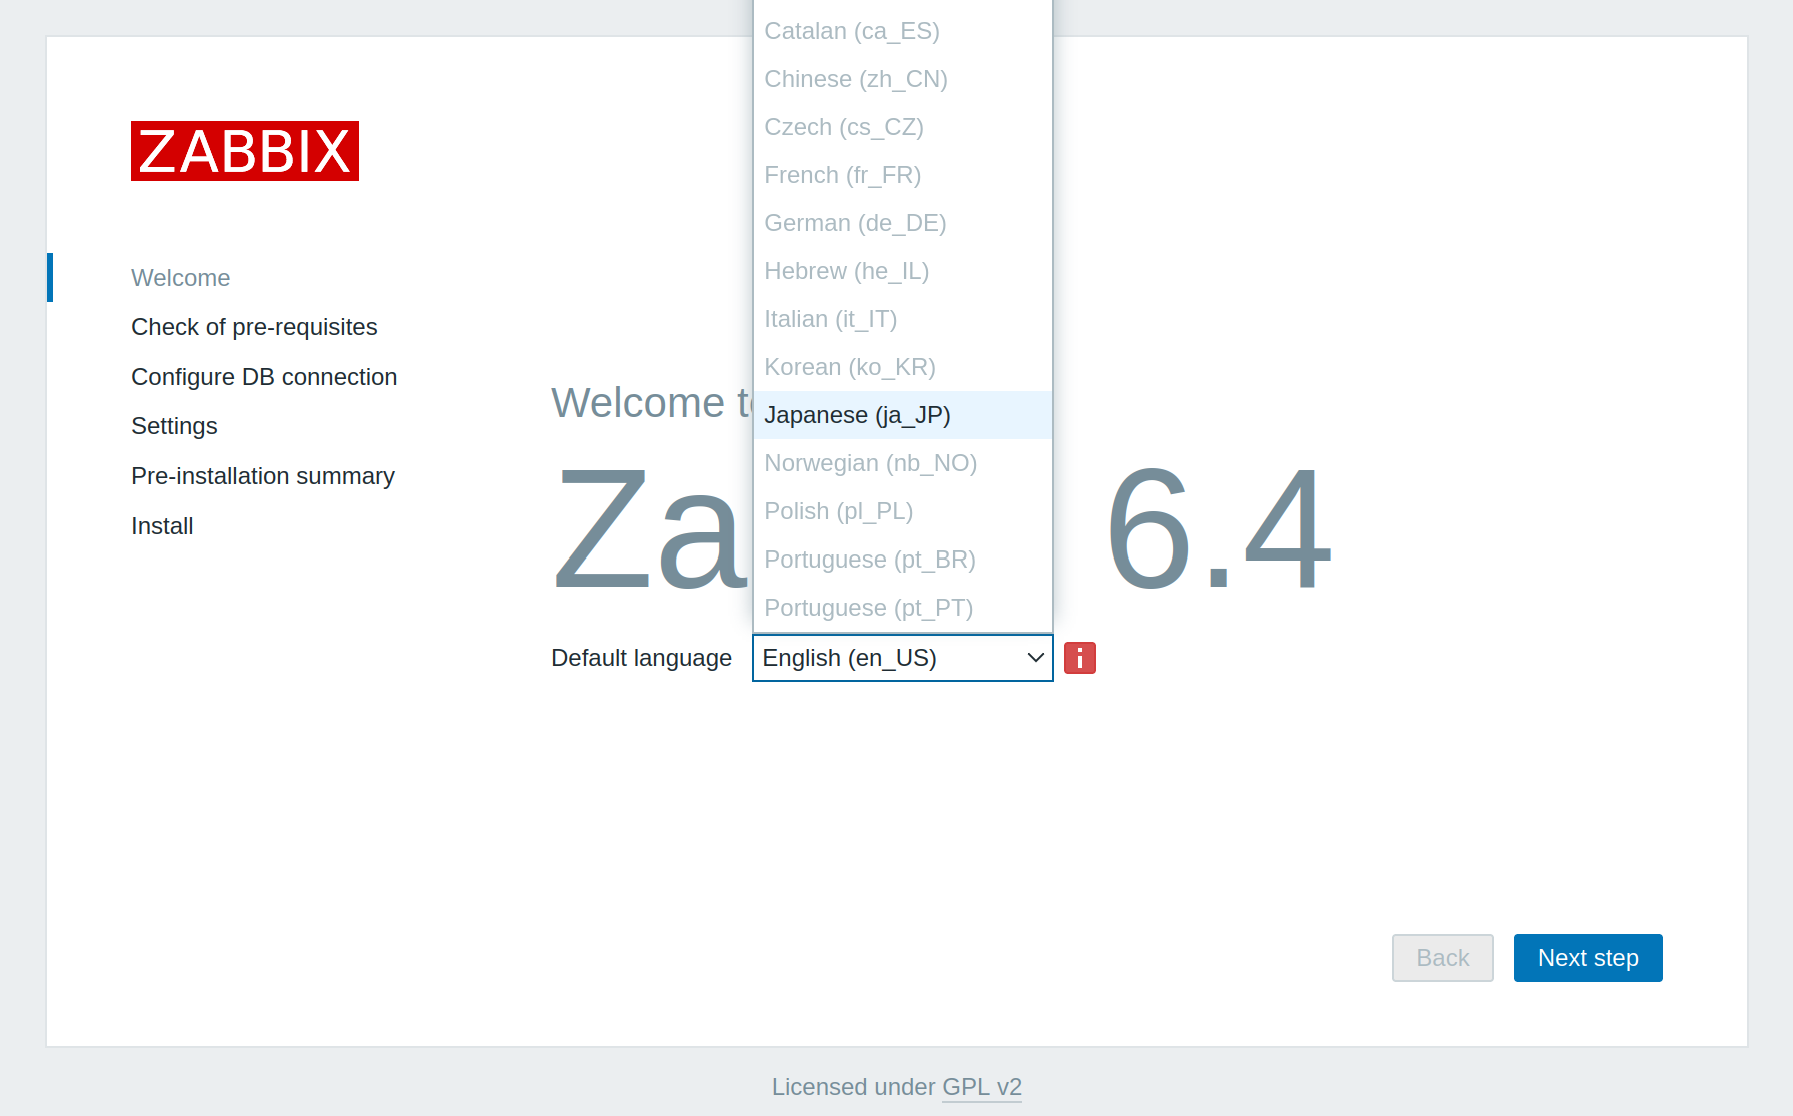
6. 「次のステップ」をクリックします。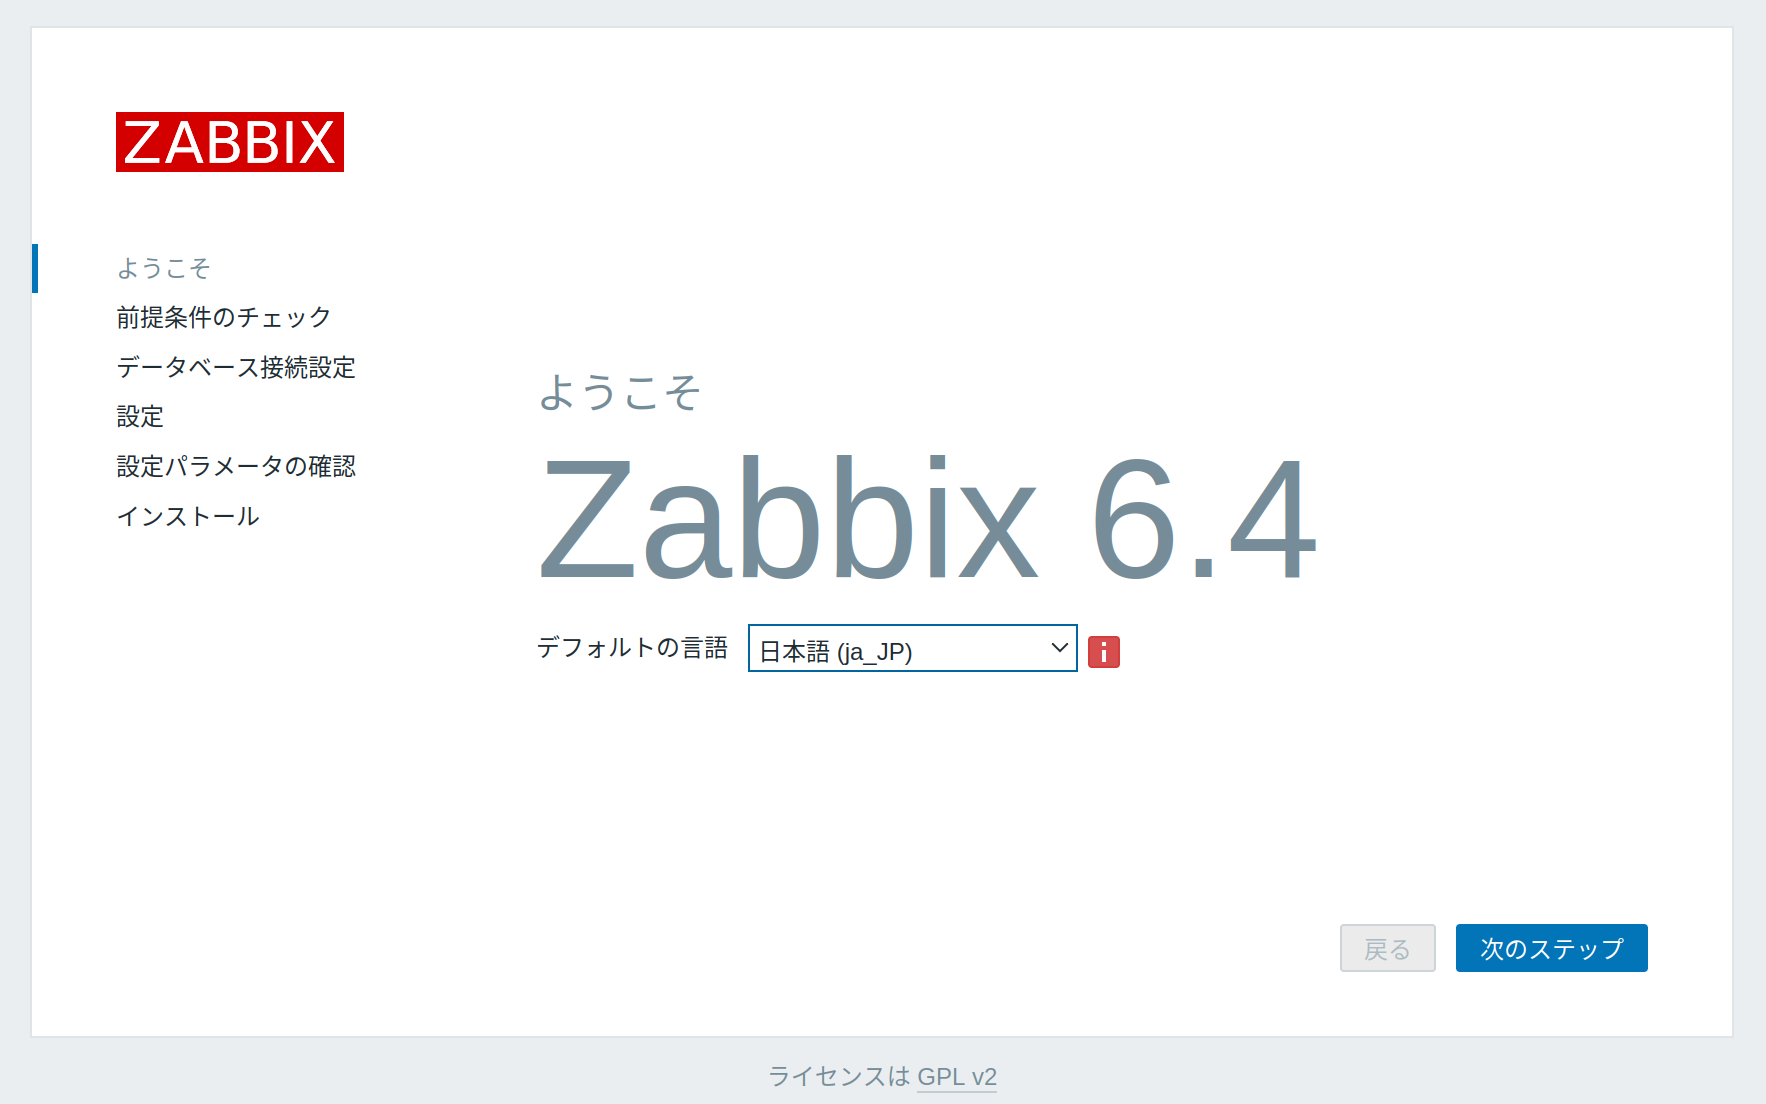
7. すべてのソフトウェアの前提条件が満たされていることを確認し、「次のステップ」をクリックします。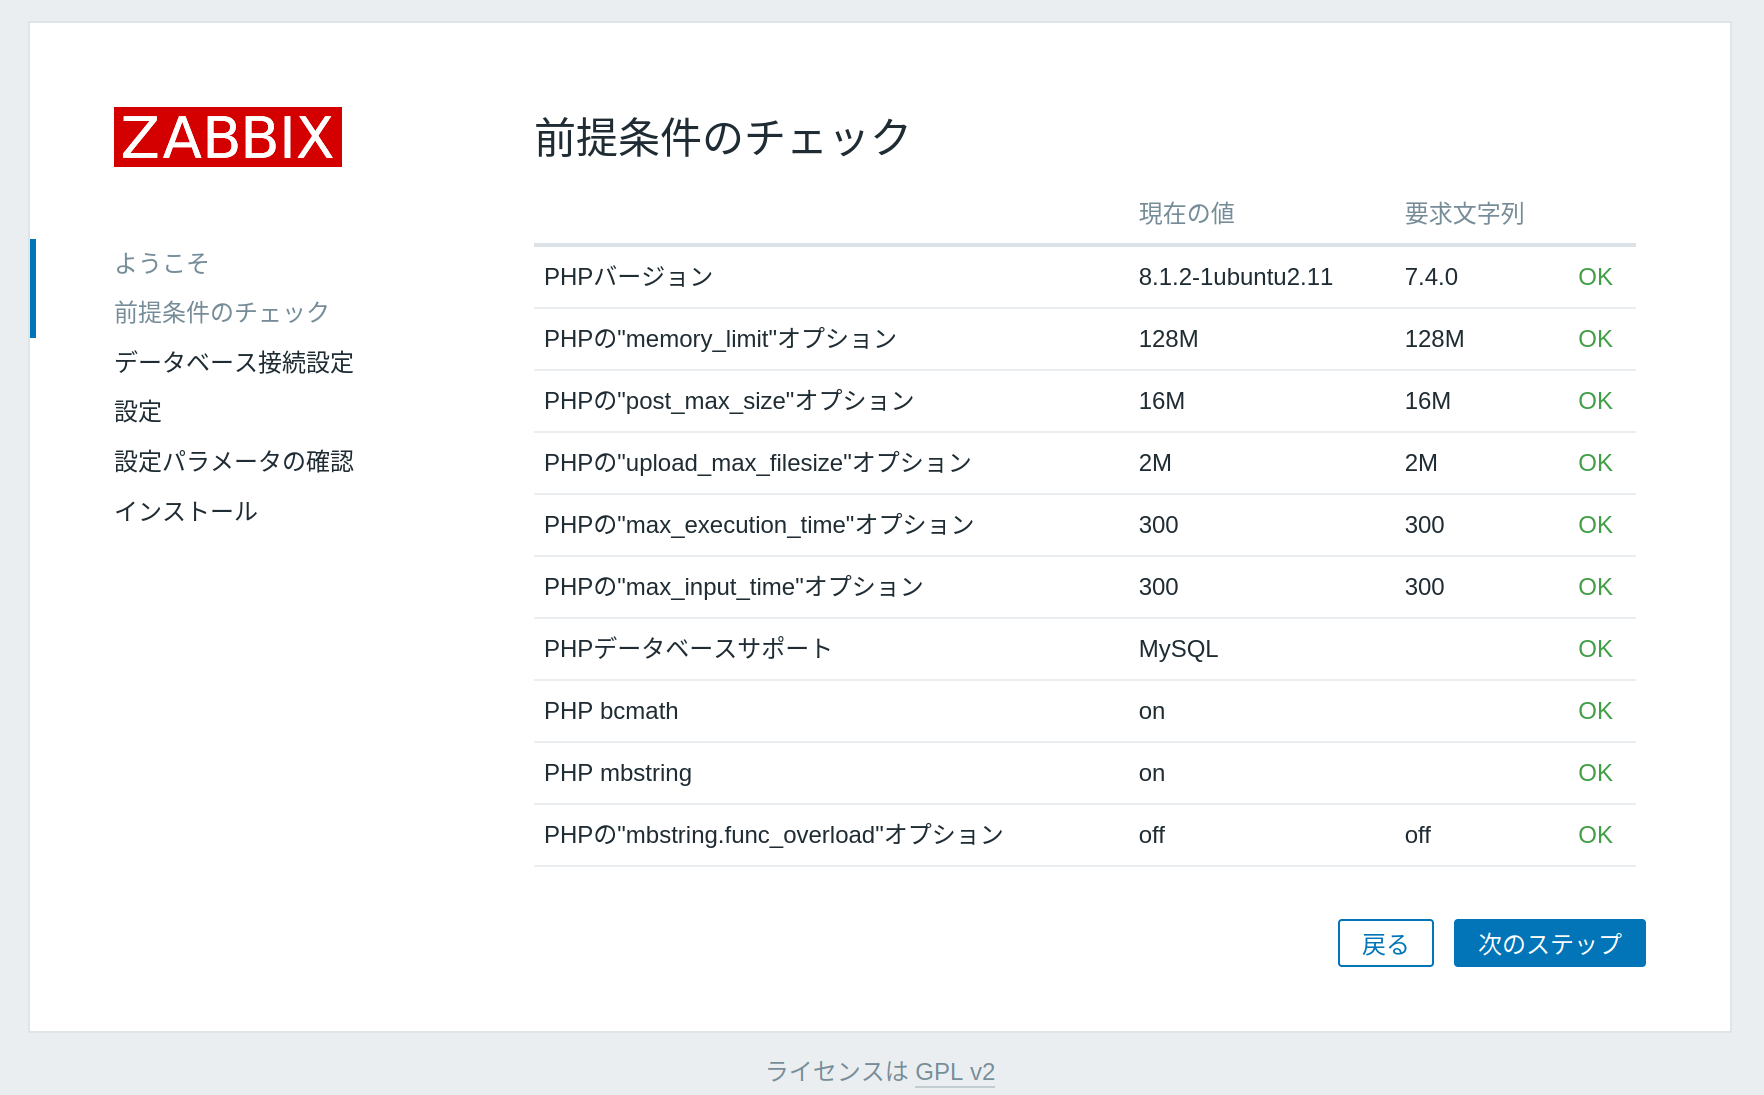
※「OK」ではなく「Fail」が表示されている場合は、php.iniを編集して該当の項目の「現在の値」を「要求文字列」に表示されている値に変更してください。変更後はwebサーバーを再起動して再度以下のURLにアクセスしてください。
http://localhost/zabbix/
8. 「Zabbixデータベースの作成」で作成したユーザーとパスワードを入力して「次のステップ」をクリックします。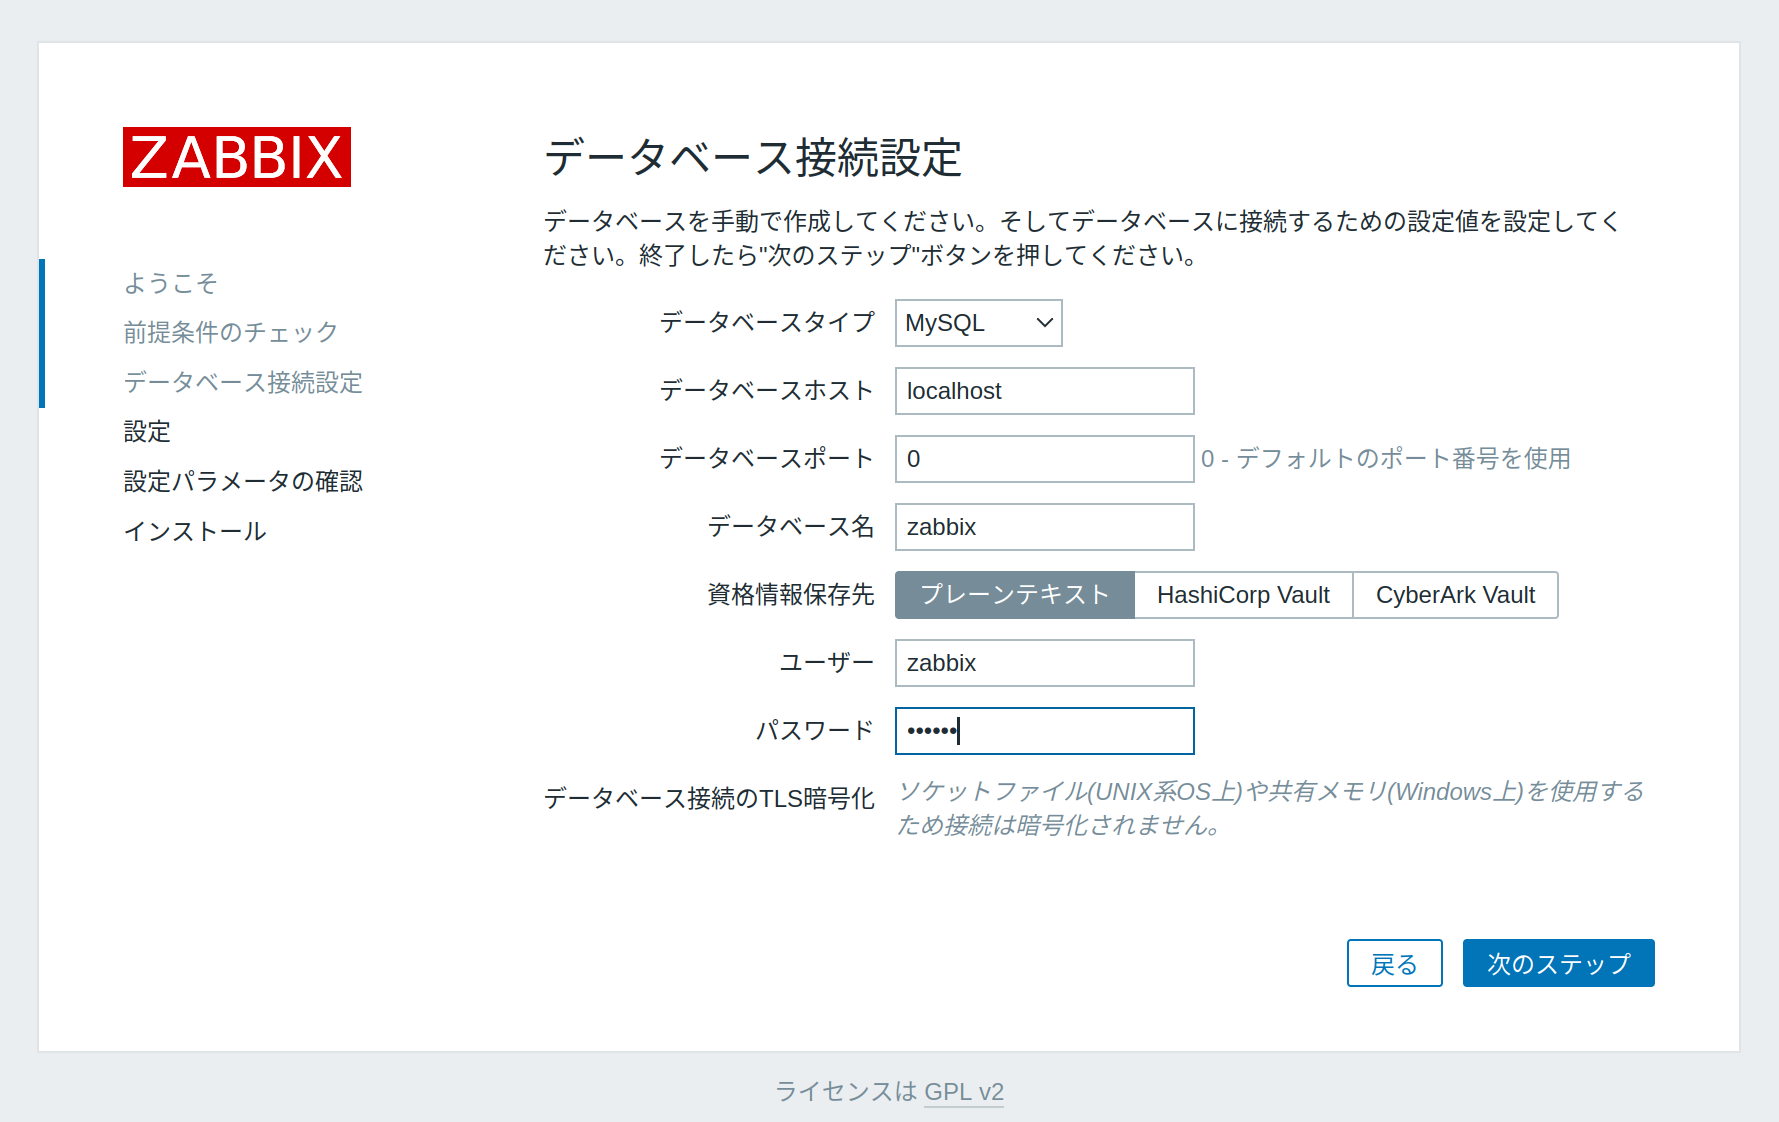
※本手順書では以下を入力しています。
データベースタイプ:MySQL
データベースホスト:localhost
データベースポート:0
データベース名:zabbix
ユーザー:zabbix
パスワード:Zabbix123@
9. 「Zabbixサーバー名」に任意の値を設定します。「デフォルトのタイムゾーン」には「(UTC+09:00) Asia/Tokyo」を選択して「次のステップ」をクリックします。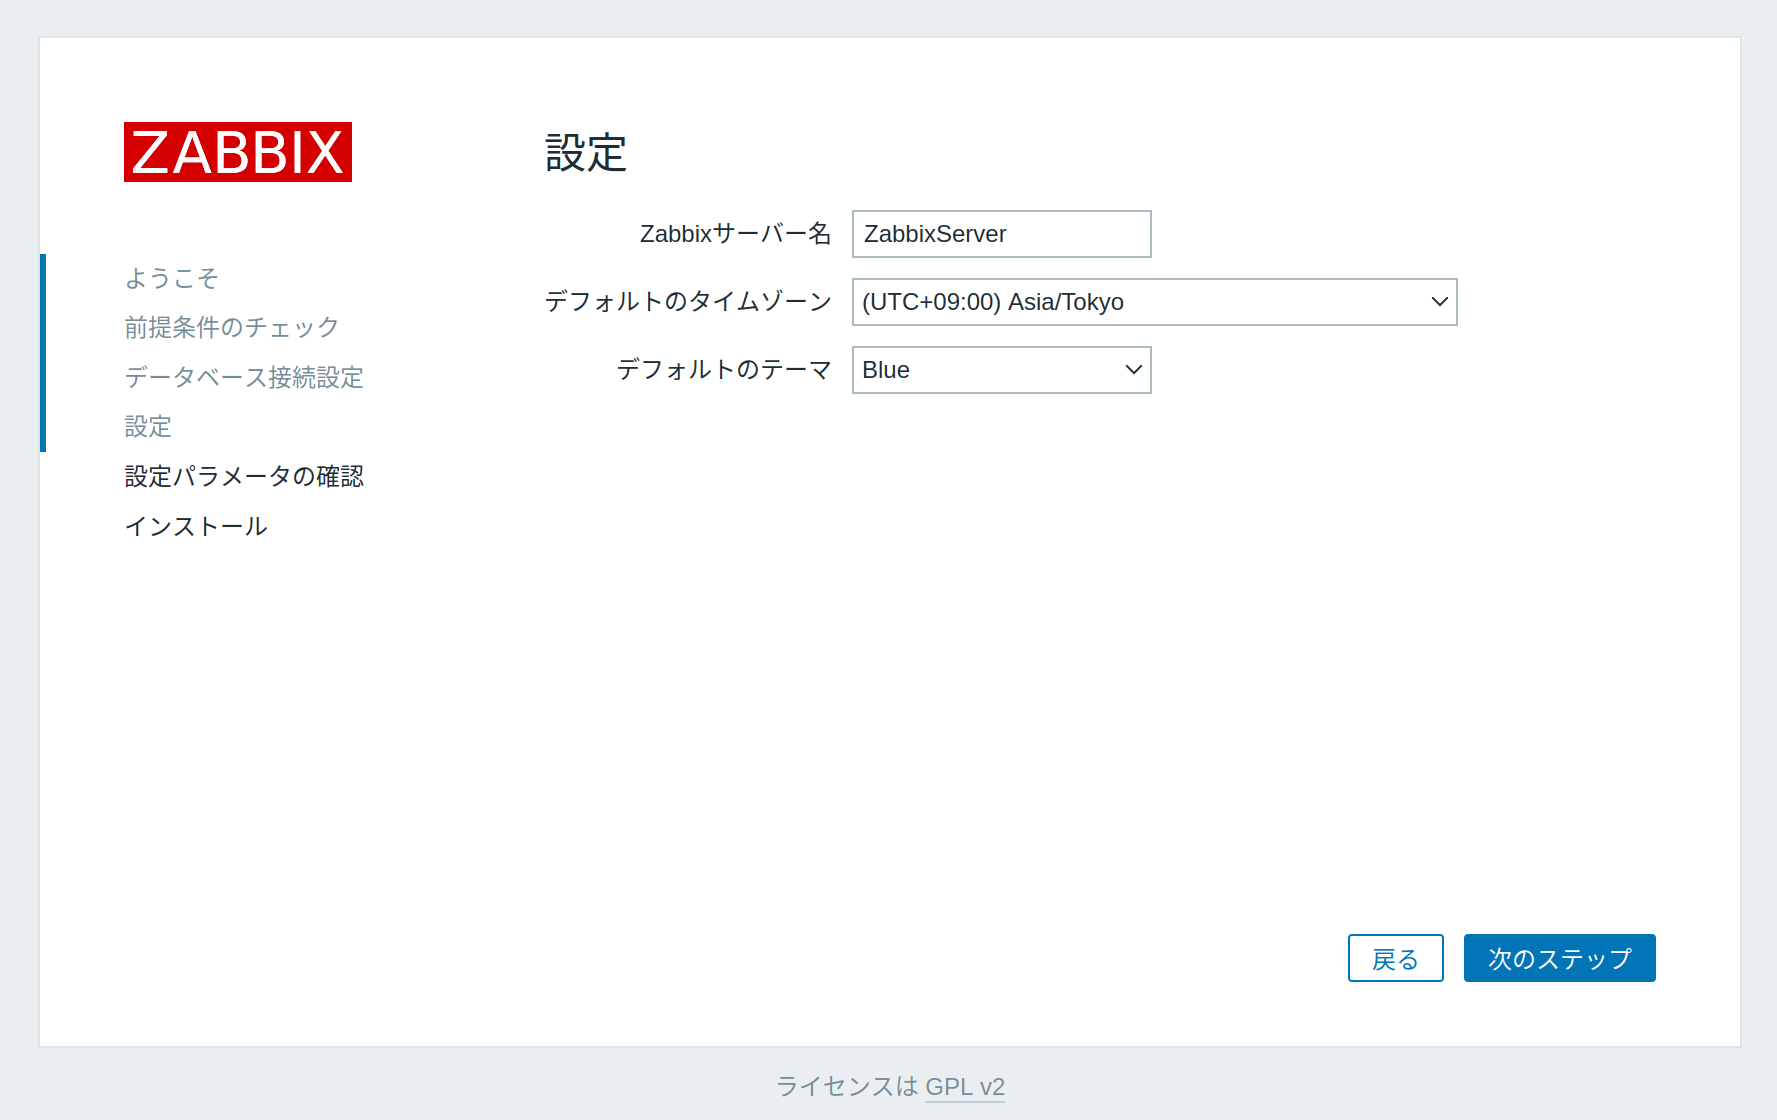
10. 設定内容に不備がないか確認します。問題がなければ「次のステップ」をクリックします。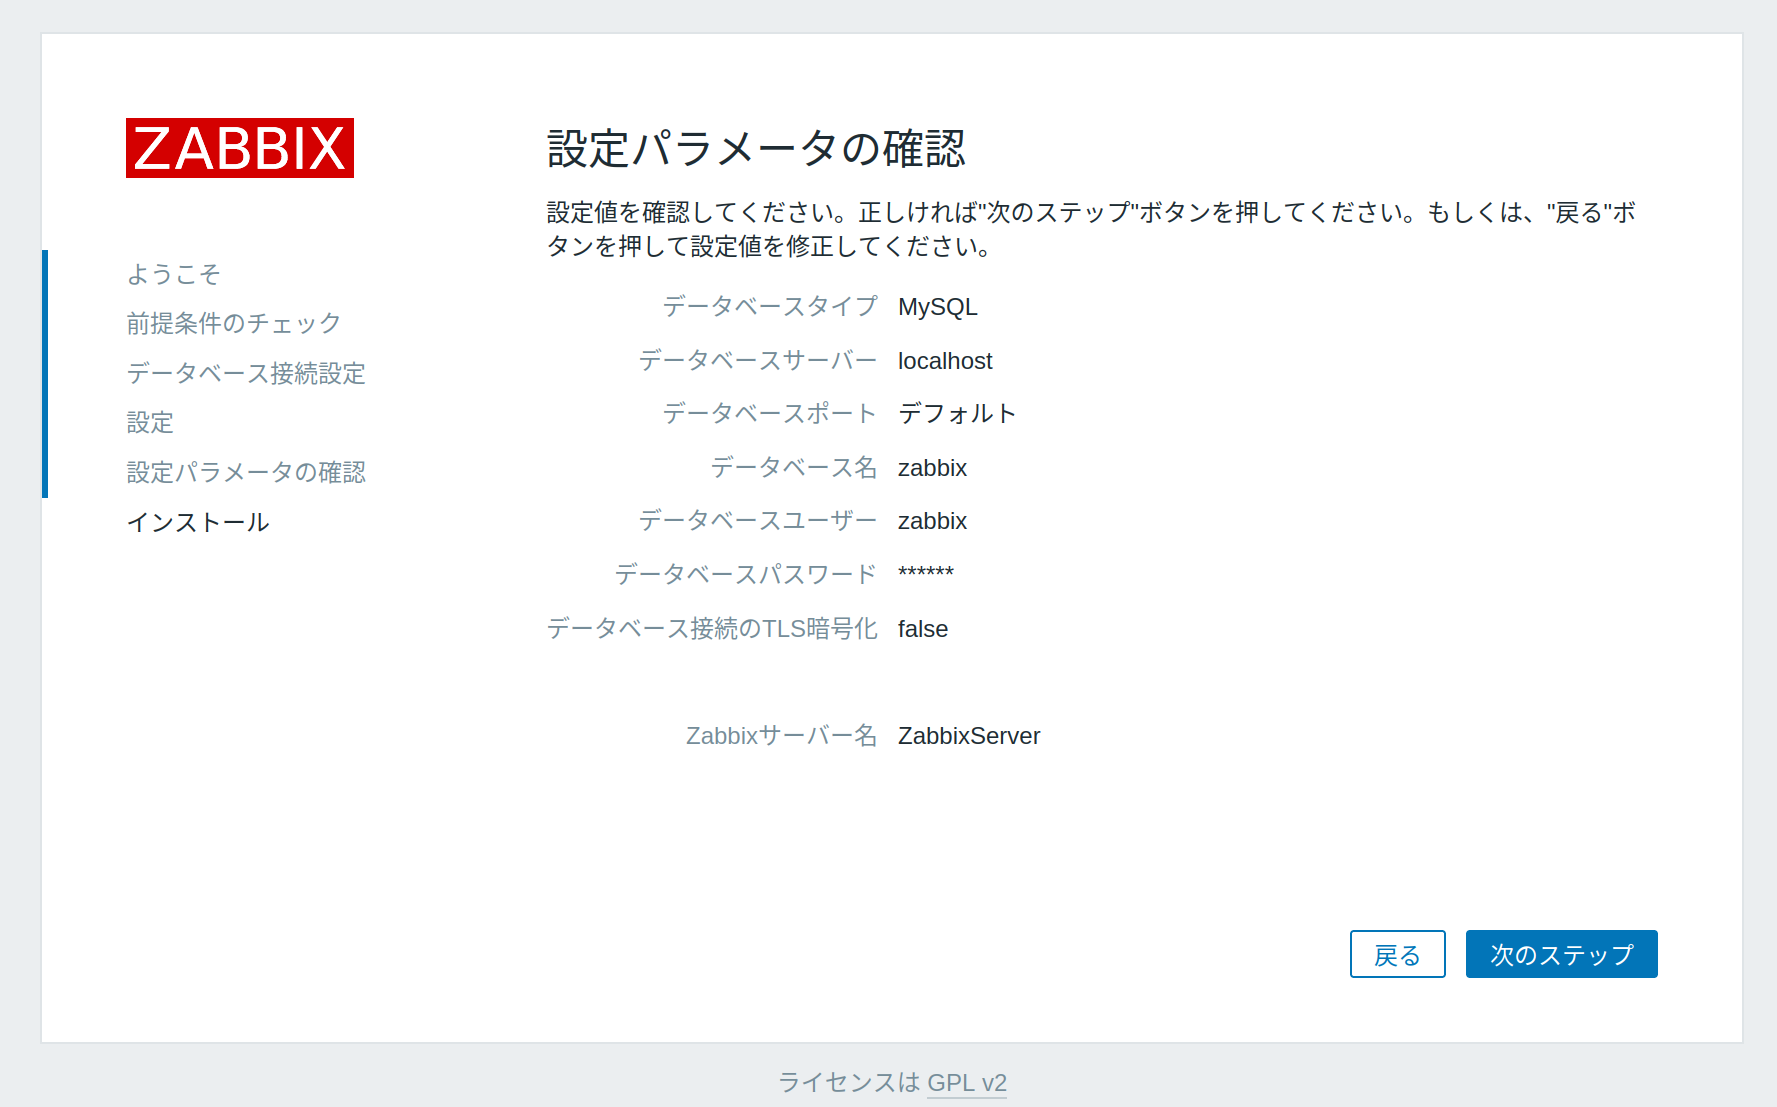
11. インストール完了画面が表示されていることを確認します。「終了」をクリックします。
※以下の画面が表示された場合は「設定ファイルのダウンロード」をクリックします。ダウンロードした設定ファイルを「/var/www/html/zabbix/conf/」に配置してから「終了」をクリックします。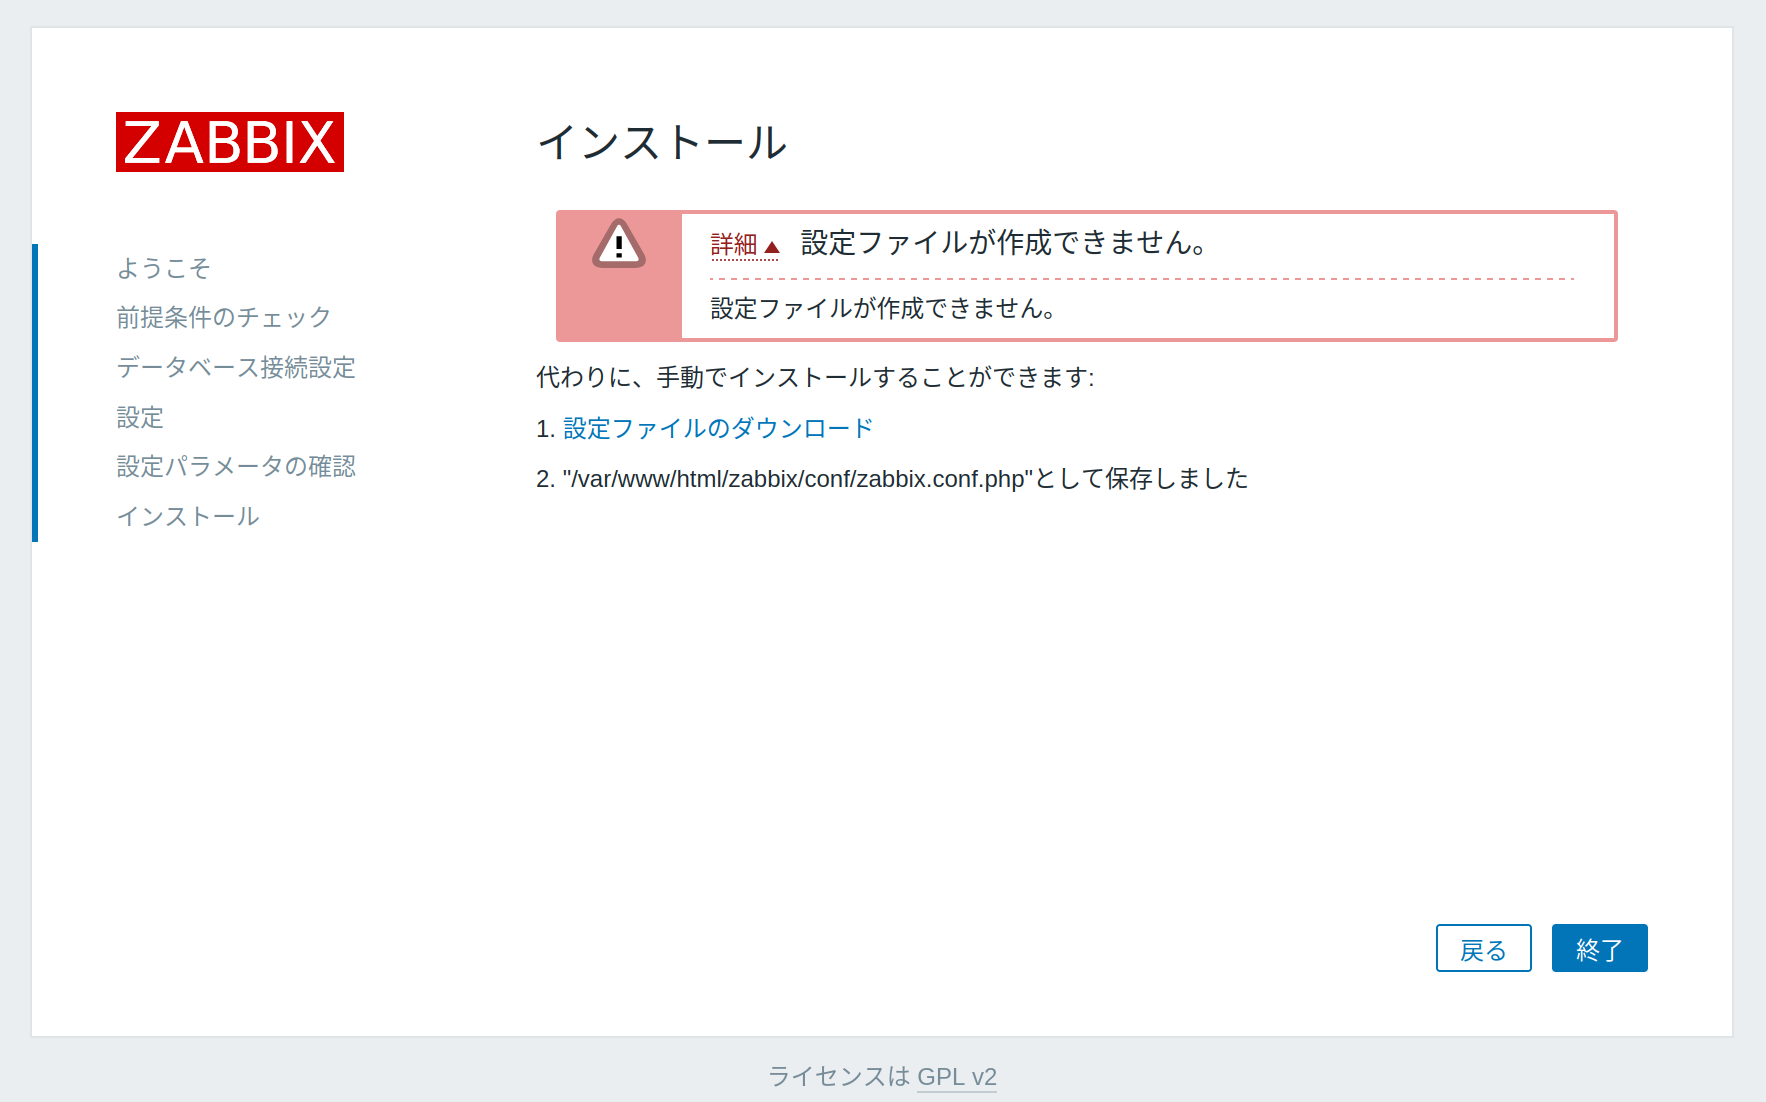
12. ユーザー名に「Admin」、パスワードに「zabbix」を入力して「サインイン」をクリックします。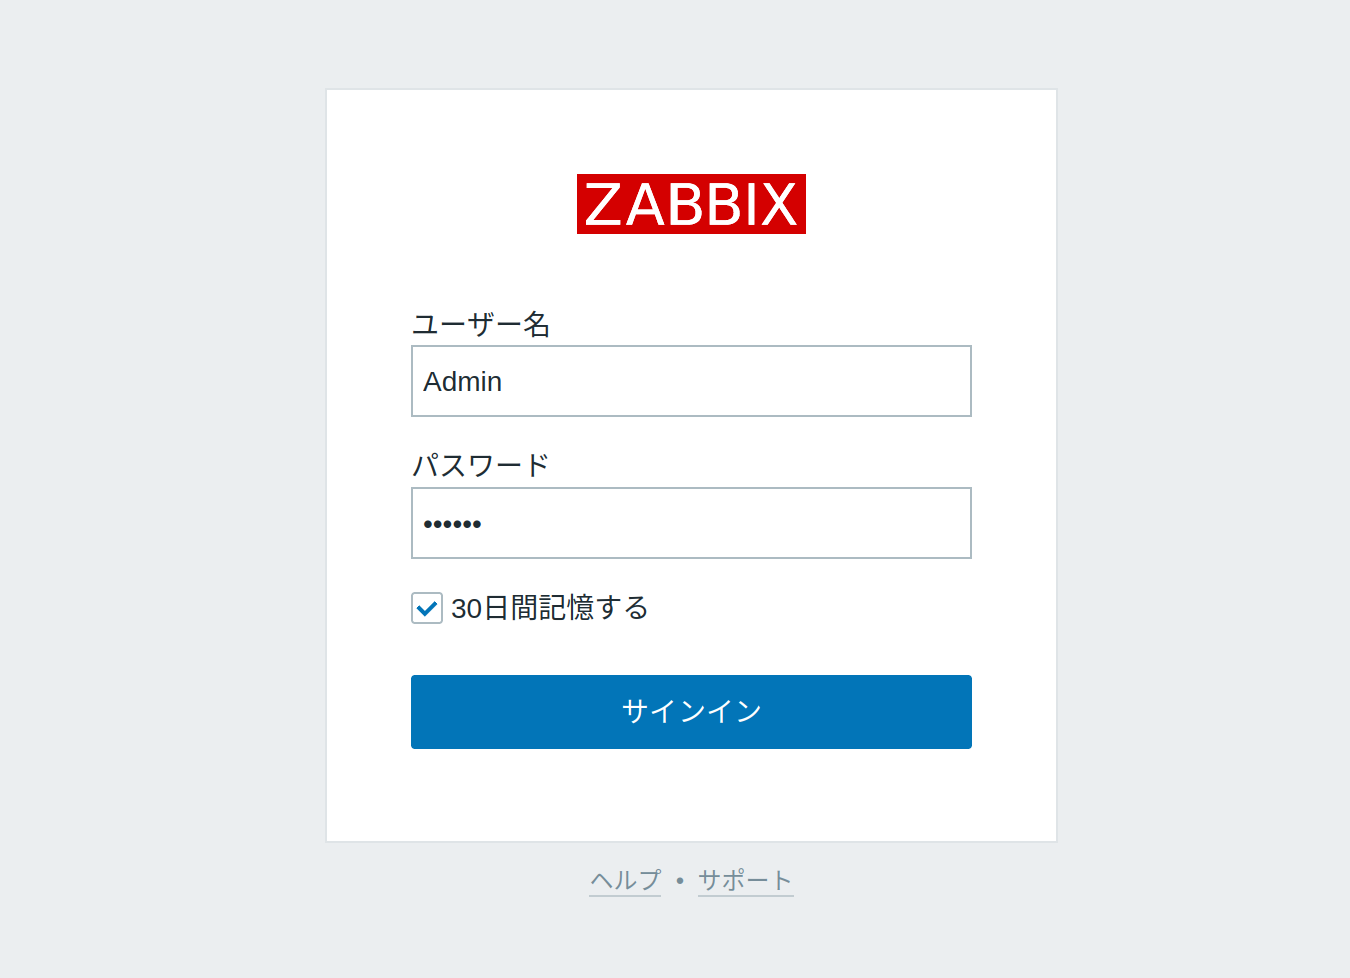
※ユーザー名が「Admin」、パスワードが「zabbix」のユーザーは初期ユーザーになります。
13. ダッシュボード画面が表示されていることを確認します。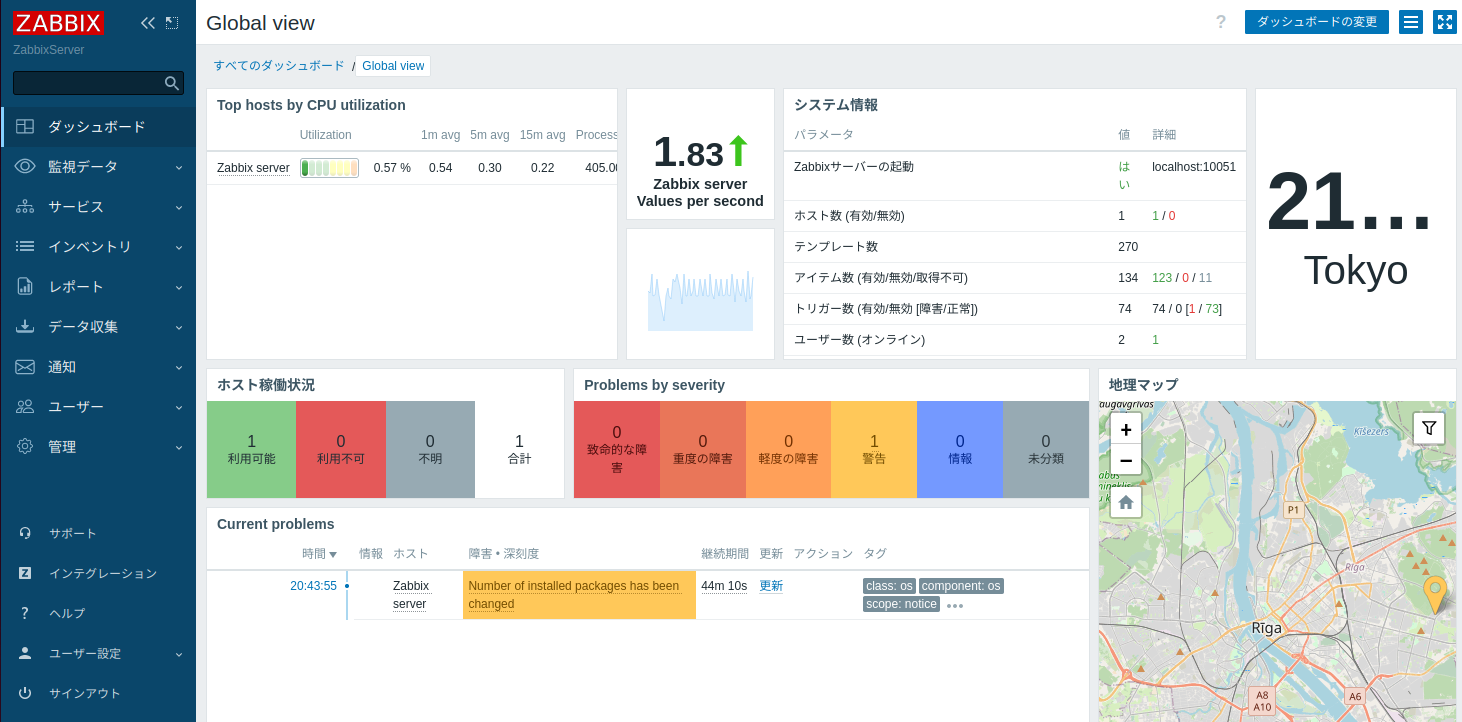
以上で全ての手順は完了になります